
Starting seeds is one of the real joys of gardening! When you learn how to start your own seeds, you’re no longer limited to whatever the store offers: You can try all kinds of varieties, grow from your own saved seed, plant throughout the season, and usually end up with plenty to share. It’s an important skill set to add to your gardening experience.
We’ve also made a downloadable and print-friendly version linked below!
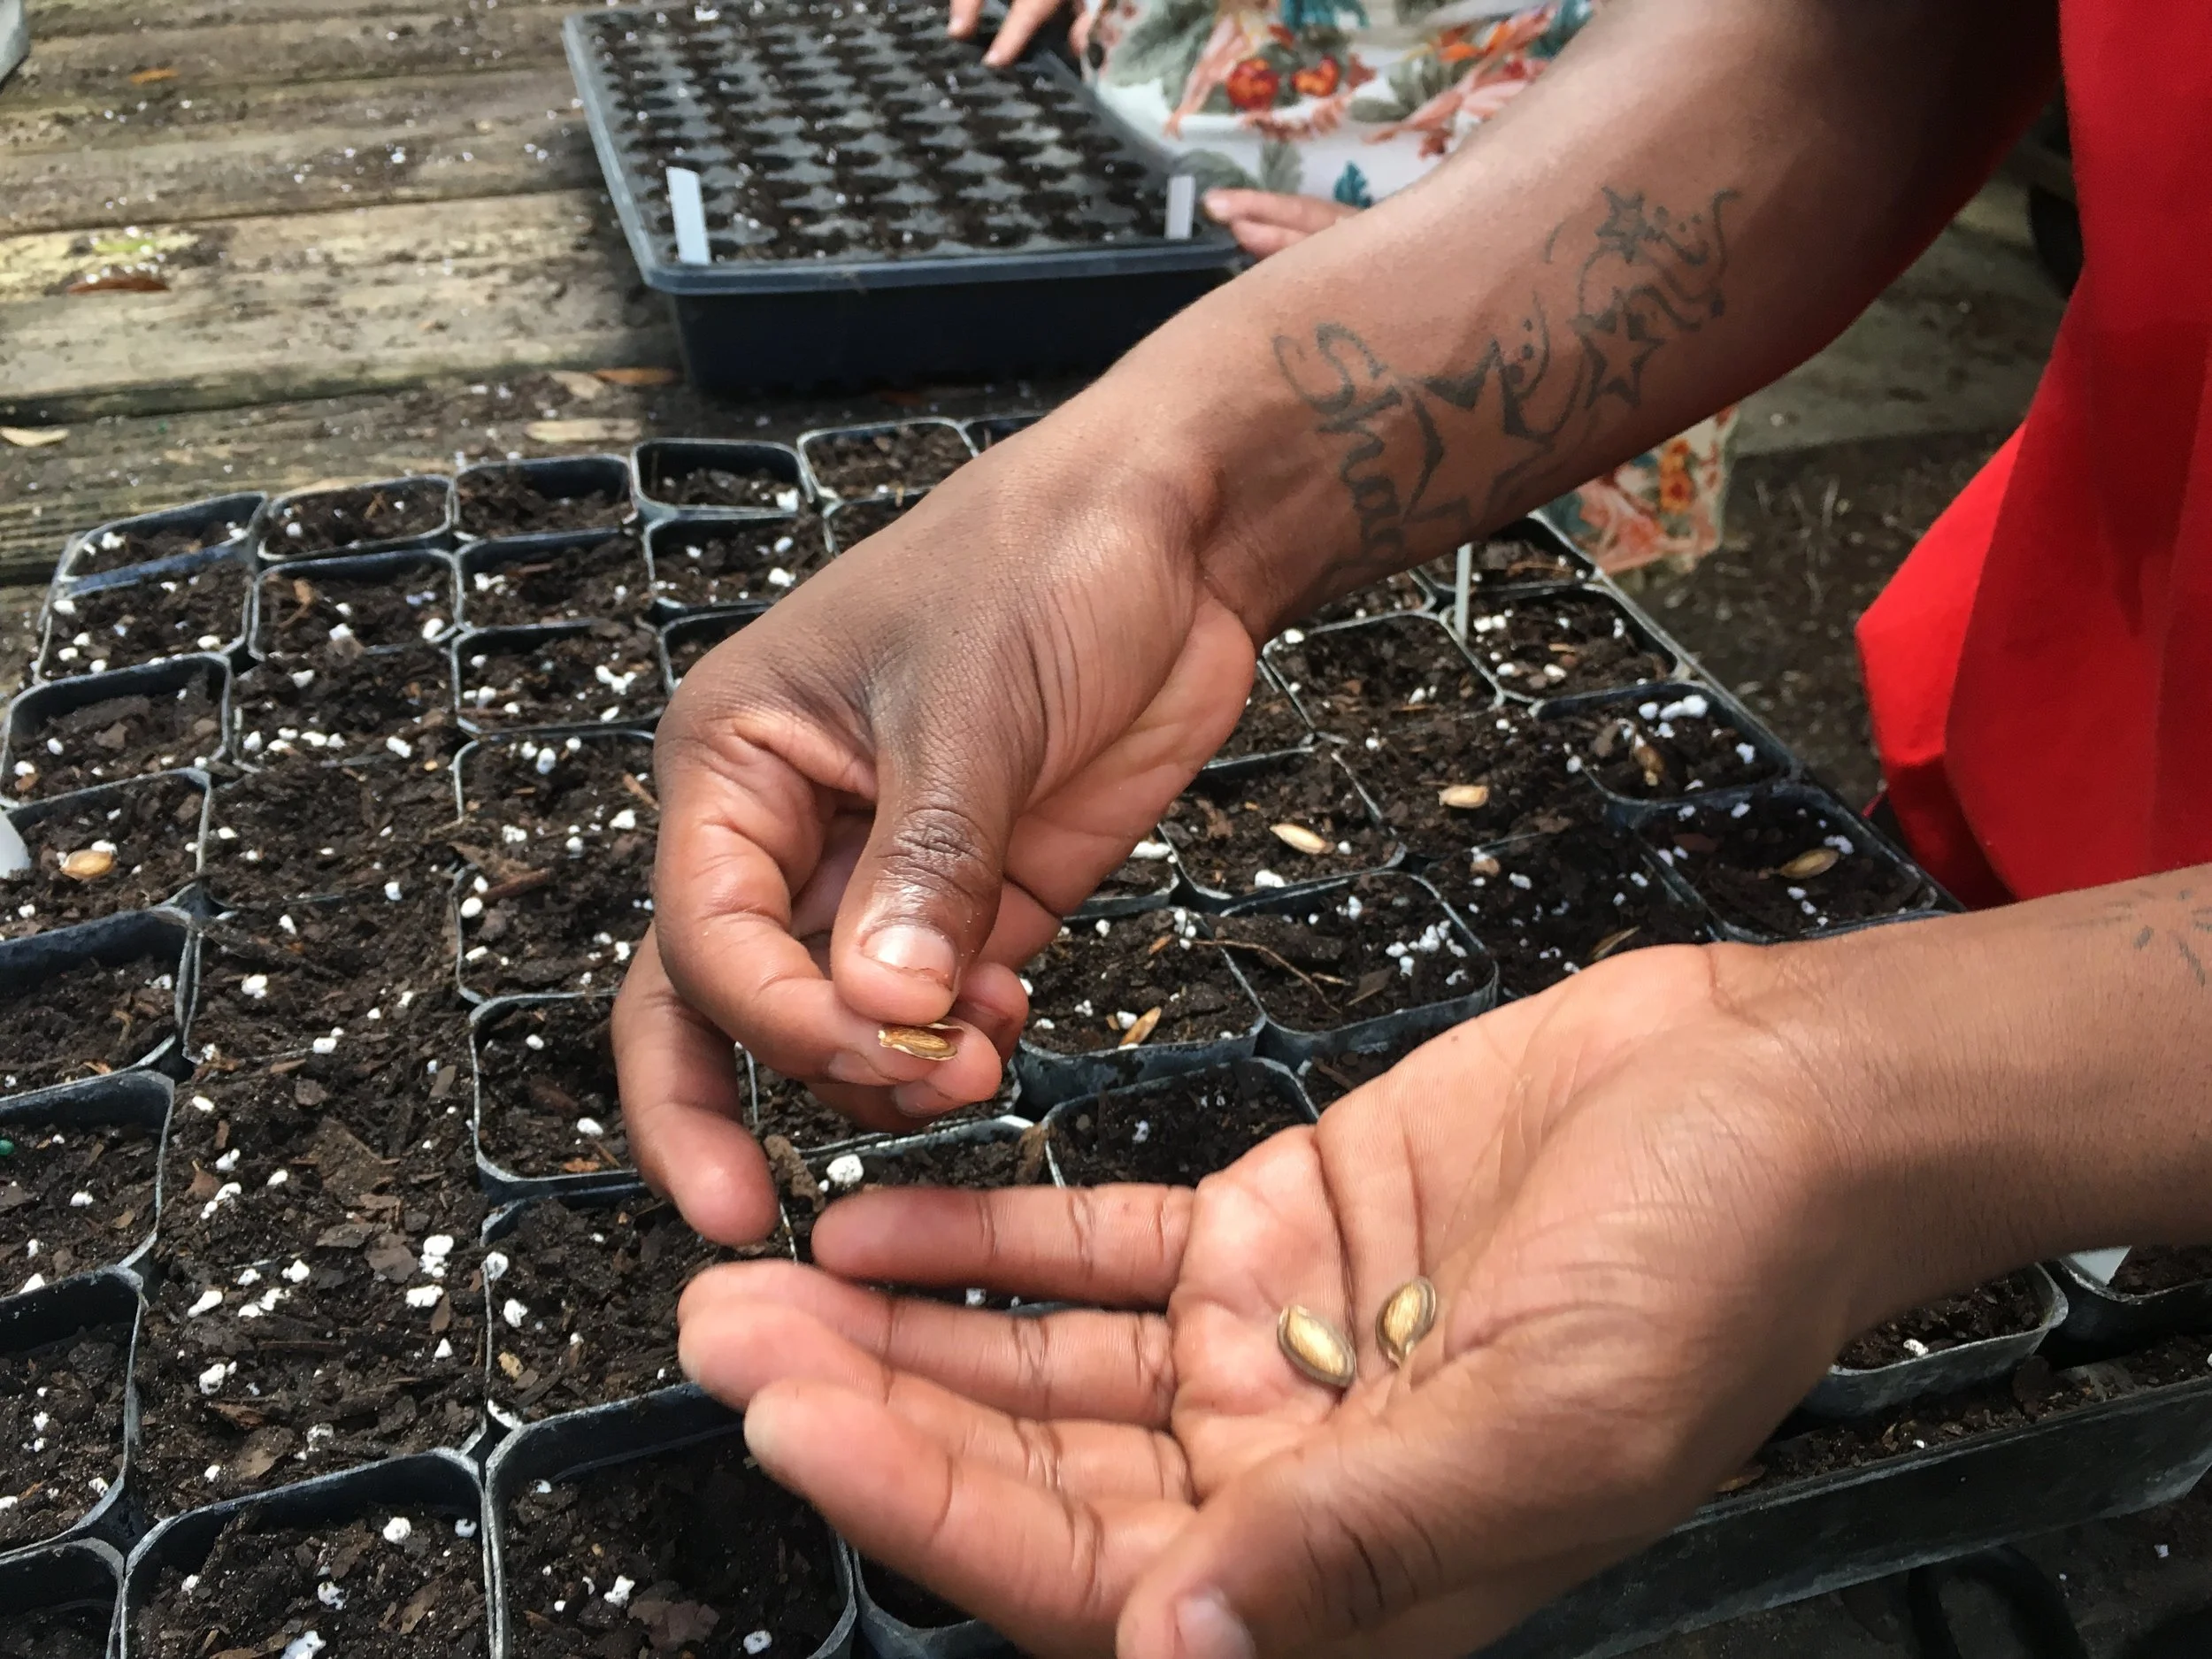
2 hands planting seeds into soil trays
Soil
A great planting medium to use for starting seeds in pots or trays is a high quality soil mix, specifically used and sold as a germinating mix.
It’s ground finely so that emerging seedlings can move through with ease.
It’s been sterilized to reduce the chance of infection in young, vulnerable seeds and plants.
This fine texture also gives you some wiggle room if you plant seeds a little too deeply.
Be careful when buying seed-starting mixes at big box stores—some brands tend to be old and hydrophobic, meaning they repel water and are difficult to work with.
A good brand is Jolly Gardener, if you can find it, or Fafard’s Super Fine Germinating Mix, which is available at many feed and garden stores.
Bags can be large for one gardener, but they keep well if you roll them up tightly, store them out of the sun and rain, and preserve moisture inside.
Do not use backyard compost or other unsterilized media for germination, as any pathogens present can easily kill seedlings. Compost is great once plants are larger and transplanted into bigger containers, but it is too risky for the delicate germination stage.
Prepared germinating mixes are lightweight, allowing tiny roots to develop easily, and contain no nutrients, which is actually beneficial—seedlings already have enough stored energy in the seed to grow until their first true leaves appear. Once those develop, you can begin fertilizing.
Containers
If you are germinating many seeds, flats or plug trays provide convenience and uniformity. They come in sizes from 18 cells to over 512.
The larger the number, the smaller each cell. Small cells work fine if you’ll transplant quickly, but if seedlings will grow longer in them, you’ll need to re-pot into larger containers.
Many gardeners like 72-cell trays for most crops and 50-cell trays for larger seeds or plants that dislike root disturbance.
You can also reuse nursery pots, yogurt cups, or other containers, provided they have drainage holes.
Avoid shallow containers such as egg cartons, which don’t give roots enough space.
Keep in mind that different crops grow at different rates, so if you mix them in one tray, it can be harder to manage.
Some great eco-friendly options include products like “Cowpots” that are made of cow manure, and are biodegradable. They work great but dry out a bit more quickly than plastic. Since they break down, they also don’t last that long, so seedlings can’t be kept in them for as long.
If you are committed to starting your own seeds every season, Winstrip trays are highly recommended. They are much more durable than typical flimsy plastic flats and cells, and have a specially designed shape that produces healthier seedlings through use of air strips, a unique bottom shape, and open cells. They stack well and will last forever if you take care of them.
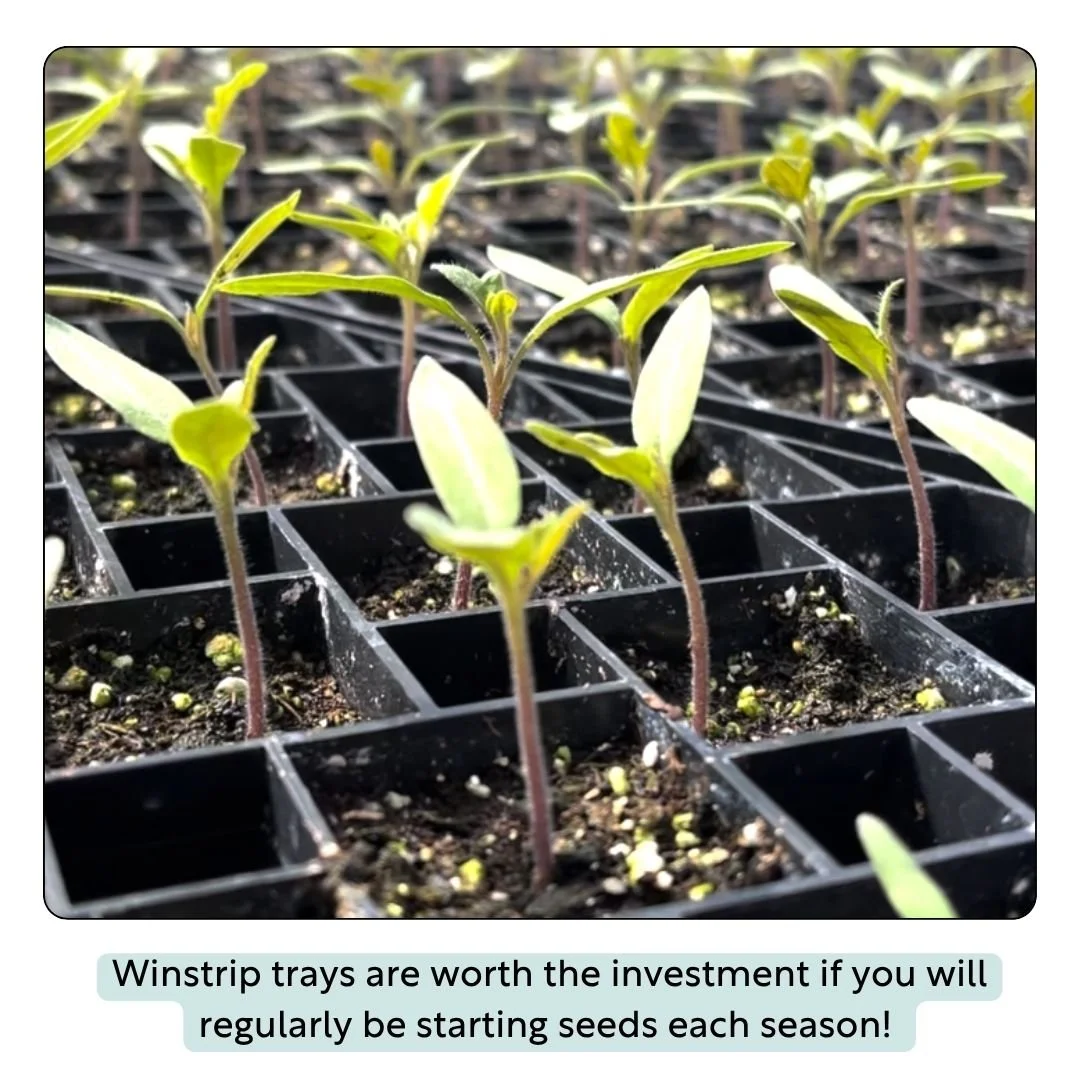
seedlings in a winstrip tray
Preparing the Soil
Before filling trays or pots, make sure your germinating mix is moistened. It should feel damp but not soggy—moist enough to hold together lightly, but not sticking to your fingers. Fill your plug trays, tamp the soil down gently with your fingers (without compacting it too hard), and you’re ready to sow!
Planting Seeds
A good rule of thumb for depth is to plant seeds about two times their size.
Very small seeds, such as lettuce, need light to germinate, so they should be sown on the soil surface and gently tamped down rather than covered.
Always check the seed packet or a reliable source for depth recommendations, but the 2x size guideline works well when you’re unsure.
Some seeds require special treatment before planting.
Large-seeded crops like beans, peas, and corn benefit from soaking in water for about 6-12 hours, which softens their seed coat, allowing water to get into the seed which kickstarts germination.
Others, such as butterfly pea, winged bean, or velvet bean, need light roughing or nicking of the seed coat (called scarification) to let water in past the tough seed coat, followed by soaking for a a few hours.
Others such as larkspur flowers and many Florida native wildflower seeds, require cold exposure (called stratification), before they’ll germinate.
Place seed packets in the fridge for 4-8 weeks, or place seeds you want to sprout, in a damp paper towel in a ziploc bag. If you do the wet paper towel method, check regularly as they may begin germinating. When they do, carefully plant them into pots after removing from the refrigerator.
To plant a seed, make a small depression in the soil to the appropriate depth. Clean and dry your hands before opening the seed packet. Pour some seeds into your non-dominant palm, then use your dominant hand to sprinkle 1–5 seeds into each depression (depending on germination rate). For tiny seeds, try using a folded card as a dispenser: load a few seeds into the fold, tilt it over the tray, and use a pencil tip to guide them one by one. A pair of reader glasses can help with fine detail. Round seeds will roll and need more careful control when dispensing.
Once the seeds are in place, lightly push soil back over the depressions and tamp gently. For large seeds like squash, cucumbers, or nasturtiums, sow on the surface and then push them down to the correct depth before covering.
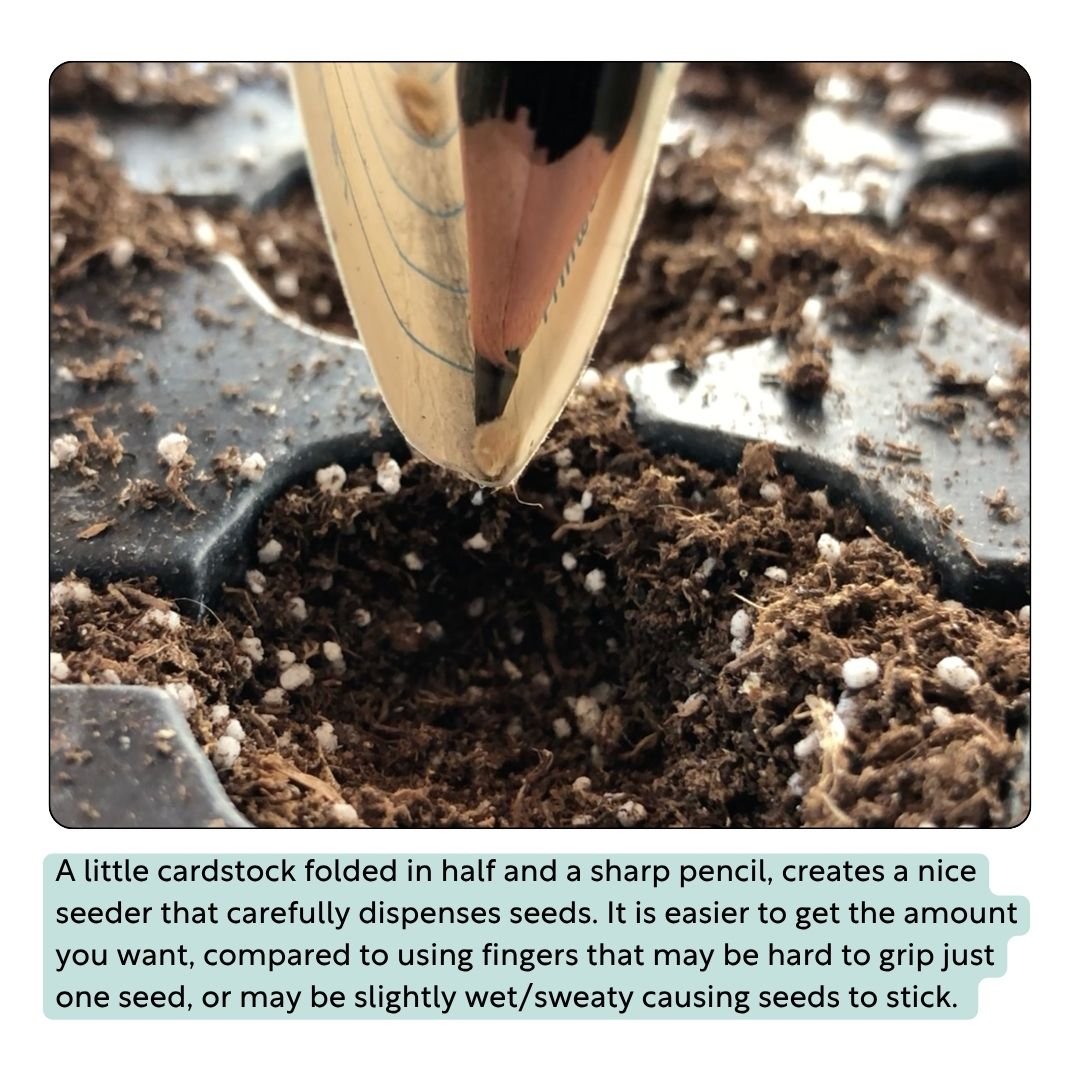
using pencil and cardstock to make a seeder
Labeling
Labeling immediately is essential, so you don’t forget what was planted!
Write the seed name and planting date on a tag and place it in the tray.
White plastic tags work well, are reusable, and take pencil markings that last longer than ink or Sharpie.
Pencils are ideal because they last a very long time, can be erased, and the tag reused; whereas markers fade and permanent ink cannot be removed.
Some gardeners cut up old venetian blinds or plastic containers for labels.
Popsicle sticks are less useful because they rot quickly and the writing wears off.
Watering
After planting, water your trays in gently. A mist nozzle or fine sprinkler head works best, as large drops can dislodge seeds. Always test your nozzle away from trays before spraying!
Check your seedlings daily (or twice daily in hot and sunny weather). One of the best ways to gauge water needs is by weight: lift the tray and compare to how heavy it feels when fully watered versus dry. The soil surface may look dry while the lower layers are still moist, so don’t rely only on appearance.
Too much water is just as harmful as too little. Overwatering, especially combined with poor airflow, encourages fungal problems like damping off - a dreadful seedling disease that causes them to all topple over and die. After watering, lift trays again to learn the feel of proper moisture levels.
If possible, set up a timer with a mister system to help automate watering. But always adjust based on temperature, sun intensity, and airflow. In hot weather you may need to water three times a day; on cool or cloudy days, perhaps only once.
Bottom watering is another option—set trays in a shallow pool of water for a short period, allowing the soil to wick moisture upward. Do not leave trays standing in deep water, as soggy conditions kill seedlings.
Think of watering like the Goldilocks rule: not too dry, not too wet—but just right! Seedlings are very vulnerable at this stage so don’t overlook them, even for a day!
Fertilizing
Seedlings don’t need added nutrients until their first true leaves appear. True leaves are the second set of leaves that develop and look like the plant’s typical leaves. They come after the first green structures (known as seed leaves or cotyledons) emerge from the seedling.
This is the time in which nutrients are no longer available to the plant from its seed, and it must start photosynthesizing and accessing nutrients through the roots from the soil.
At that point, you can begin fertilizing once a week with diluted fish emulsion, compost tea, or another mild organic fertilizer sprinkled on the soil surface.
Adjust frequency based on the type and strength of fertilizer you use. If seedlings look weak or yellowing, they may need additional nutrients.
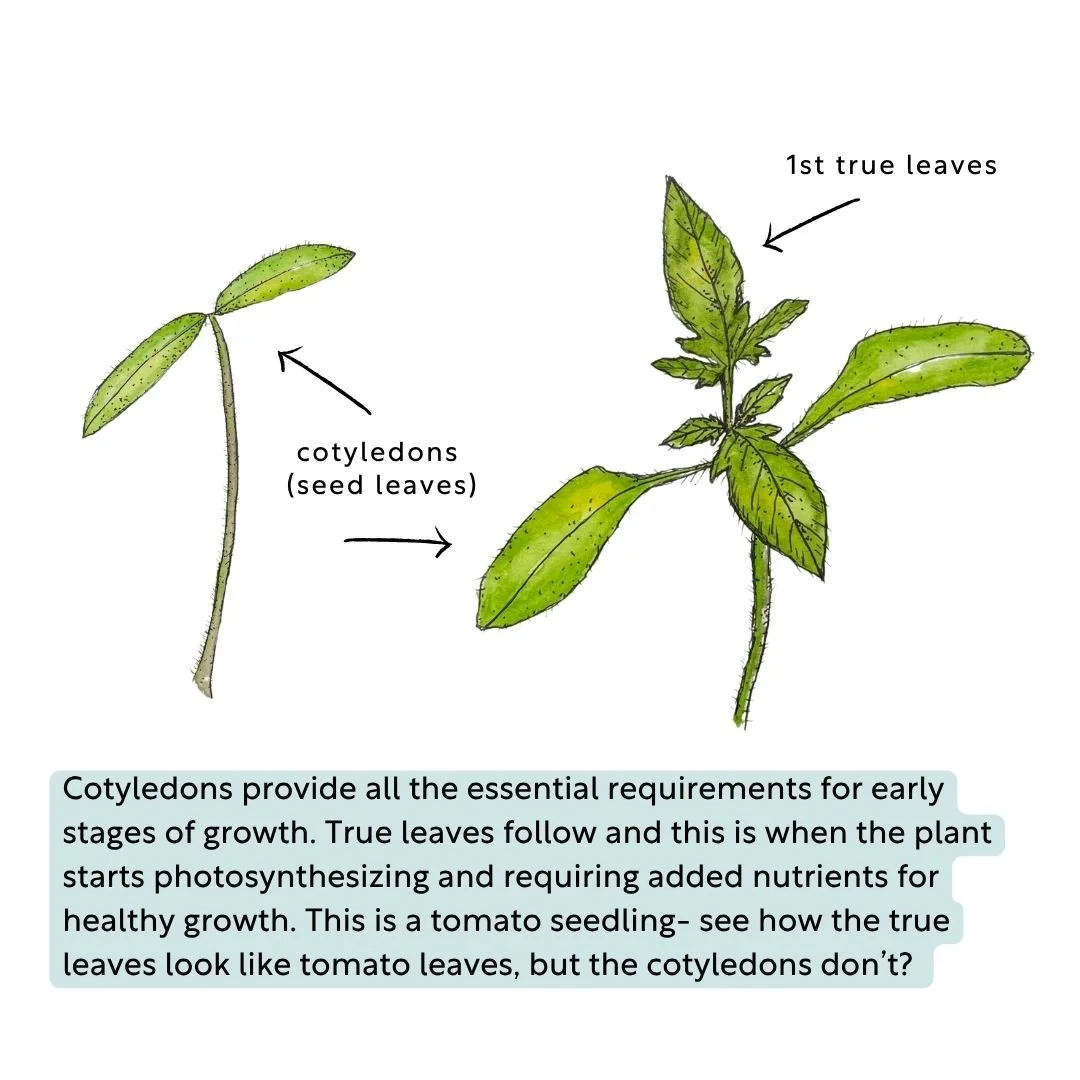
seed leaves versus true leaves
Light, Heat, and Humidity
Adequate light is essential, and what most new seed starters get wrong.
Seedlings need 12–16 hours of bright light per day, and without enough light they will become leggy and weak.
In Florida, ambient humidity is often sufficient enough for seedlings, but depending on your growing conditions, seedlings may benefit from a clear dome or plastic cover over the tray during germination to increase it. Remove the cover promptly once seedlings emerge to prevent disease and overheating.
Temperature also matters. Most seeds germinate best with soil temperatures between 75–90°F. For cool homes, outdoor greenhouses, or early sowings, use a heating mat or place trays in a warm location, such as on top of a refrigerator.
Some seeds prefer cooler conditions, so always check requirements for each seed. Tomatoes and peppers, for example, germinate much better with bottom heat, which allows you to start them in January or February, putting you on track for mid March/early April planting outdoors.
After germination, seedlings no longer need extra warmth and the heat can be turned off. The exception is peppers which can be left longer especially if the air temperature is still chilly.
Care and Maintenance
Encourage strong seedlings by providing airflow and adequate spacing from other seedlings. A small fan set on low will improve ventilation, reduce disease risk, and strengthen stems. You can also lightly brush seedlings with your hand every day to mimic the natural stress of wind.
Crowded seedlings become leggy and tall, as they search for sun and compete with their neighbors for it. Give them plenty of room to maintain good airflow and ample light, which will result in a stronger seedling.
If multiple seedlings sprout in one cell, thin them by carefully cutting weaker ones at the base with scissors. It is also possible to very carefully remove an intact seedling and plant it into another cell, instead of killing it. It’s hard to get rid of sprouted seeds, but if you could use more plants or want to share the excess, you can save them by trying to carefully remove them from overly crowded cells. One plant per cell is ideal.
As seedlings grow, check whether they need transplanting into larger pots.
Give a light tug at the base—if the plant resists a bit, and holds up well with intact roots and soil, it’s ready for a bigger pot or to go into the garden!
If roots are still small and soil is loose, they need more time in the cell. You can also gently coax the seedling out of its cell with the flat end of a utensil to inspect the root system if the tugging is challenging or feels like you’ll injure the little seedling.
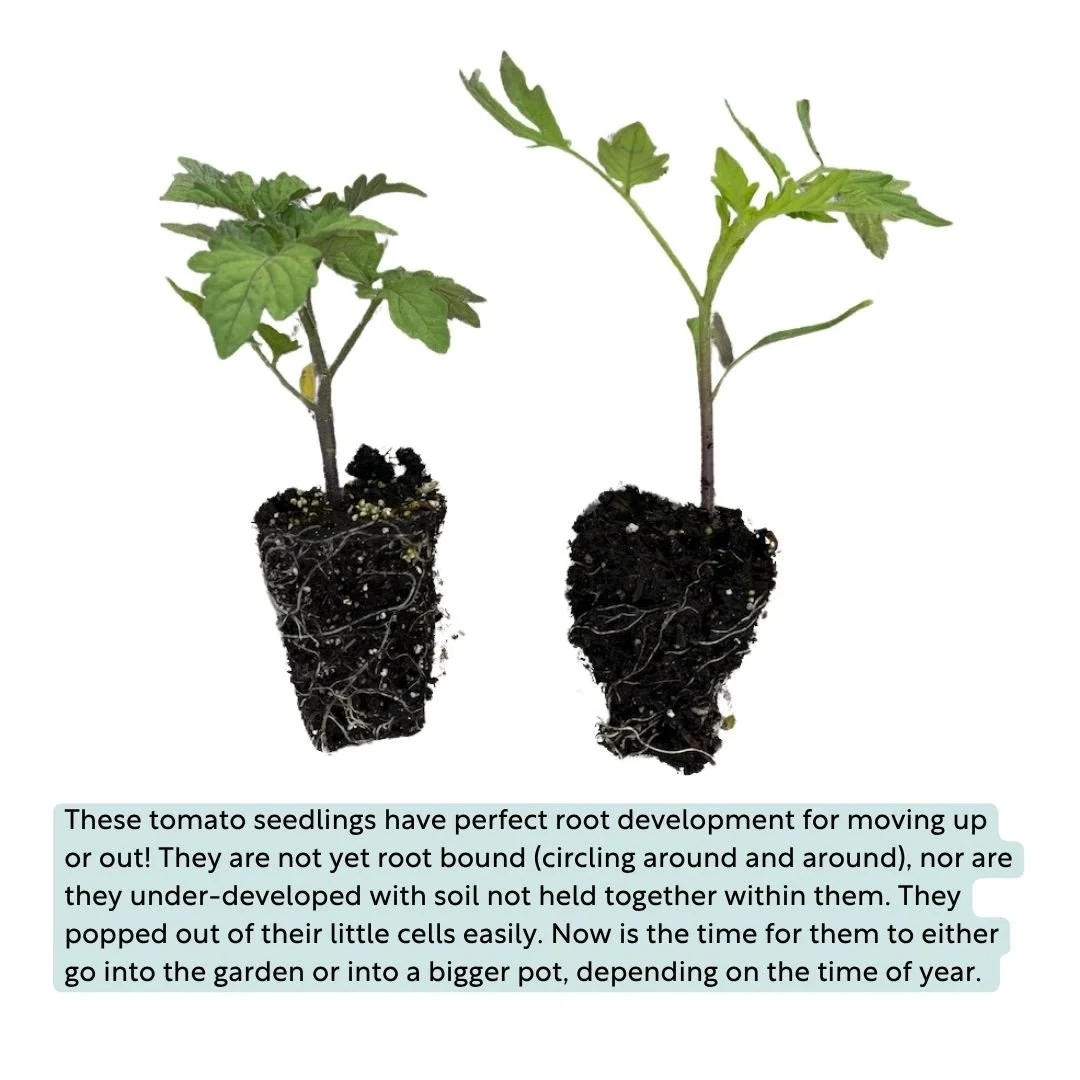
tomato seedlings ready to transplant
Avoid transplanting too early which stresses the plant with inadequate roots for their new home, or too late, which may have caused seedlings to become root-bound.
Root bound seedlings are sometimes challenged for the the rest of their growth as adult plants, stuck in a cycle of circular rather than outward root growth. Try to avoid this, but if they are a bit root-bound, gently loosen and release the roots before re-planting.
Most seedlings spend 3–6 weeks in trays, depending on plant type, container size, and environmental conditions.
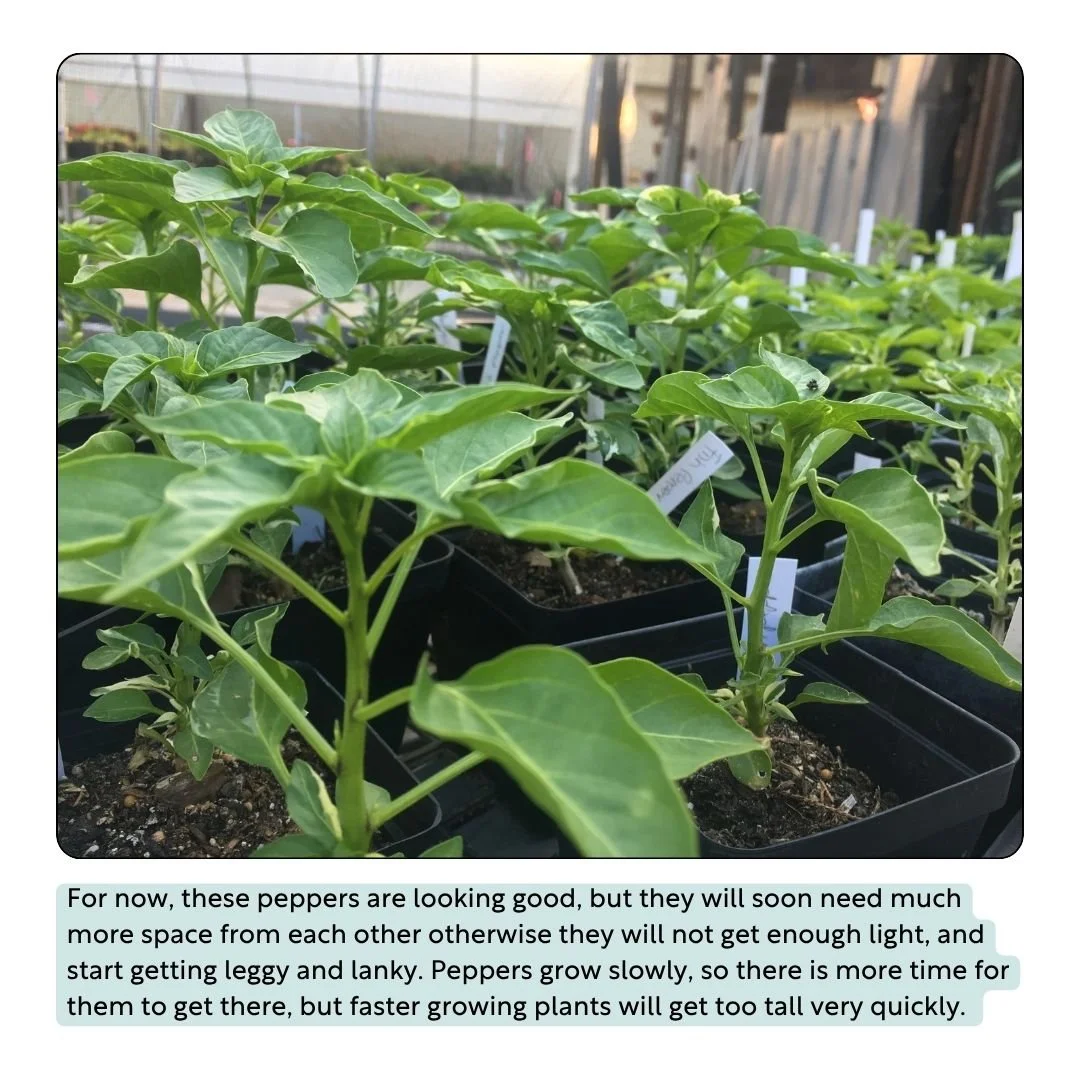
pepper plants growing in seedling pots
Hygiene
Always start with clean containers. Residual pathogens in dirty pots may kill seedlings.
Avoid using compost at the germination stage; reserve it for transplanting into larger pots or garden beds.
Keep airflow moving and maintain good plant spacing to avoid overcrowding.
Transplanting into the Garden
If seedlings have been grown indoors, they should first be hardened off, which allows them to become more accustomed to the outdoors.
Gradually increase their time outdoors over several days, starting with a few hours and working up to full days. This reduces shock when they are permanently planted out.
If they were grown in an outdoor greenhouse, they won’t need to harden off, as they have already been subjected to the fluctuations of temperatures and light, having lived semi-outdoors.
When possible, choose overcast or cool days for transplanting outside, ideally in the morning or evening rather than midday.
Water them in really well after planting.
With the exception of tomatoes that like deep planting, only bury the plants up to their existing soil line from their container.
Some plants, such as root crops and legumes, are best direct-seeded into the garden because they dislike transplanting. Others, like melons, cucumbers, and sunflowers, dislike root disturbance, so either plant them in larger pots to begin with to avoid re-potting, or directly sow them where they’ll stay.